

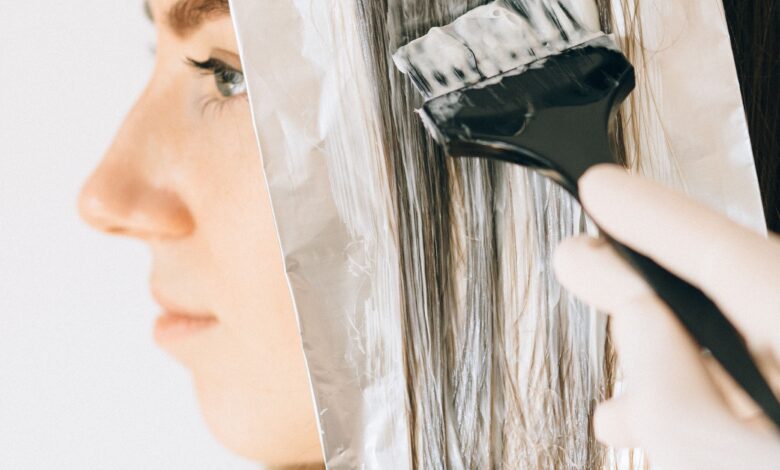
To do highlights at home you pick a lightener kit section your hair apply the product to thin strands and let it process while you watch the color. Most kits take 20 to 45 minutes. Always do a strand test first.
Learning how to do highlights at home saves money and works well for subtle brightening. Big color changes are still better left to a stylist.
This guide covers three methods what you need and how to avoid brassy orange results.
What You Will Need
Get everything ready before you mix. Once the lightener is mixed the clock starts.
- A highlighting kit or separate lightener and developer
- A tint brush for painting on product
- Foils or a highlighting cap depending on your method
- Sectioning clips
- Gloves and an old towel or cape
- A timer
- Purple toning shampoo for after
Skip metal bowls. Use plastic or glass since metal can react with lightener.
Pick Your Method
Three approaches work at home. Match the method to the look you want.
| Method | Look it gives | Difficulty | Best for |
| Cap | Fine evenly spread highlights | Easiest | First timers and short hair |
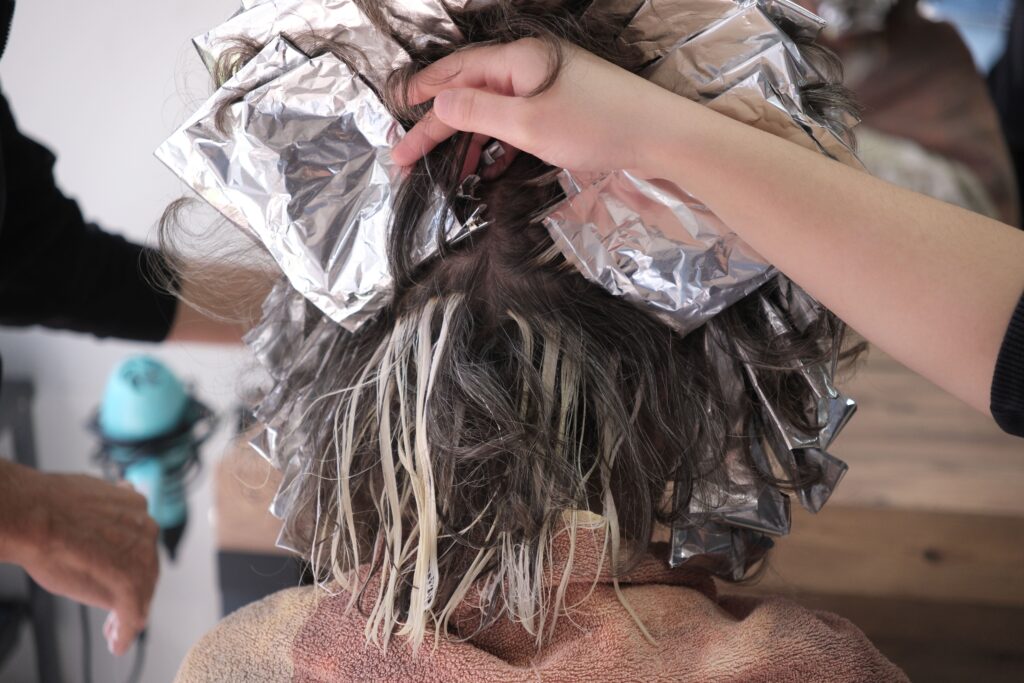
| Foil | Defined bold streaks | Medium | Classic salon style highlights |
| Balayage | Soft sun kissed blend | Medium | Low maintenance grow out |
Beginners should start with the cap or balayage method. Foils take the most practice to keep even.
Do a Strand Test First
Never skip this. It tells you two things.
First it shows how light your hair actually goes and how long that takes. Second it shows whether your hair can handle the process without breaking.
Snip a small hidden piece of hair. Apply the mix. Check it every five minutes. Note the time it takes to reach the shade you want.
How to Do Highlights at Home Step by Step
Here is the general process. Adjust the placement for your chosen method.
- Start with dry unwashed hair. Natural oils protect your scalp.
- Brush and section. Divide hair into four sections and clip them up.
- Mix the lightener exactly as the instructions say. Do not eyeball it.
- Apply to thin strands. Thin pieces look natural. Thick pieces look stripey.
- Start at the back where mistakes hide and work forward.
- Keep highlights away from the scalp by about half an inch. Heat there processes faster.
- Set your timer and check every five minutes. Watch the color not the clock.
- Rinse when you hit the shade you want. Do not wait for the maximum time.
- Shampoo and condition with the kit conditioner.
- Tone if needed to kill any brassy tones.
That checking step matters most. Every head of hair lifts at a different speed.
Highlighting Without Foil
You can get a soft look with no foils at all. This is the easiest at home approach.
- Brush the lightener onto the surface strands only
- Focus on pieces that frame your face
- Feather the product downward so there is no hard line
- Leave the roots alone for a grown out effect
Air exposure lifts a bit slower than foil so allow extra time.
How to Avoid Brassy Orange Hair
This is the biggest home highlight complaint. Dark hair goes through orange on its way to blonde.
Here is how to handle it:
- Do not try to go too light in one session. Lift in stages weeks apart.
- Use a toner after lightening to neutralize warm tones.
- Purple shampoo helps maintain cool tones between sessions.
- Accept a warmer shade if your hair is very dark. Caramel looks better than damaged.
Dark brown or black hair rarely goes platinum safely at home. Aim for a few shades lighter instead.
Mistakes That Cause Damage
Avoid these and your hair stays healthy.
- Leaving lightener on too long. Set a timer and check often.
- Overlapping onto previously lightened hair. This causes breakage.
- Skipping the strand test. You are guessing without it.
- Using a high developer volume. Higher is faster but far more damaging.
- Highlighting damaged hair. Repair first then color.
If your hair feels gummy when wet stop and see a stylist.
Aftercare for Highlighted Hair
Lightened hair needs more moisture. Build these habits.
- Use a sulfate free shampoo
- Add a deep conditioning mask weekly
- Lower your heat styling temperature
- Use purple shampoo once a week not daily
- Wait six to eight weeks between highlight sessions
Choosing the Right Shade
Picking a shade that suits you matters as much as technique. Go too light and it looks harsh. Go too subtle and you cannot see it.
A simple rule helps. Stay within two or three shades of your base color for a natural look. Bigger jumps read as bold and need more upkeep.
- Cool toned skin suits ashy and cool highlights
- Warm toned skin suits golden and caramel highlights
- Face framing pieces should be slightly lighter to brighten your face
- Back pieces can be a touch deeper for depth
When unsure go lighter near the face and softer at the back. That mimics how sunlight naturally falls.
Cap vs Foil vs Balayage in Detail
Each method gives a different result. Here is how to choose.
The cap method pulls thin strands through a cap with a hook. It gives fine even highlights and is very hard to mess up. It works best on short to medium hair.
The foil method wraps painted sections in foil. It gives bold defined streaks and lets you place color exactly. It takes the most practice to keep even.
The balayage method paints color on freehand with no foil. It gives a soft grown out look with no harsh line. It is forgiving for beginners.
How Often to Refresh
Highlights grow out gently which is part of their appeal. You do not need constant touch ups.
- Full highlights every 8 to 12 weeks
- Face framing pieces every 6 to 8 weeks
- Balayage every 3 to 4 months since it grows out softly
- Toning every few weeks to keep the color fresh
Waiting between sessions protects your hair. Over processing is what causes breakage.
Frequently Asked Questions
Can you really do highlights at home?
Yes especially subtle ones. Cap and balayage methods work well for at home use. Dramatic changes on dark hair are riskier and often need a professional.
How do you highlight hair at home without foil?
Paint the lightener directly onto surface strands with a tint brush. Focus on face framing pieces and feather it downward. This gives a soft sun kissed look with no foils needed.
How long do you leave highlights in?
Most kits process 20 to 45 minutes. Check every five minutes and rinse when you reach the shade you want rather than waiting for the full time.
Why did my highlights turn orange?
Dark hair passes through orange while lifting. It means the hair did not lift far enough or was not toned. Use a toner after lightening and consider lifting in stages.
Final Tip Before You Start
Highlights at home come down to patience and checking often. Do a strand test start at the back and rinse when the color looks right.
Your next step is small. Snip a hidden test strand tonight and time how long it takes to lift. That single test tells you everything you need for the real thing.