
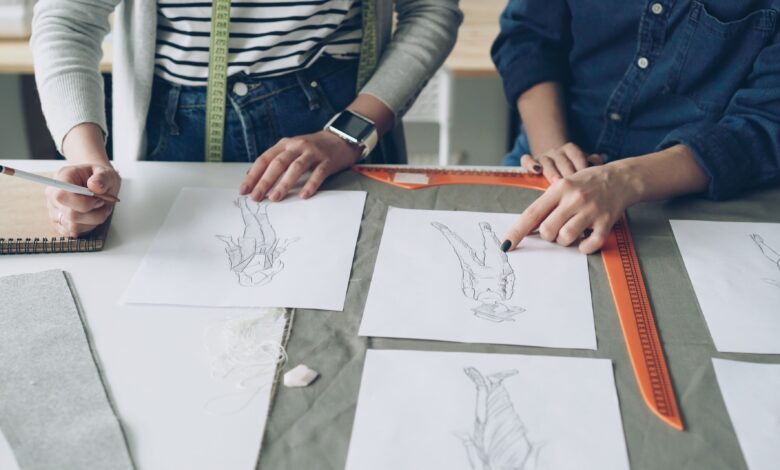
To draw fashion figures you start with a stretched body template called a croquis. Most fashion figures are drawn nine heads tall instead of the realistic seven and a half. That extra length makes clothing designs read clearly on the page.
Learning how to draw fashion figures is mostly about proportion and balance not artistic talent. Once you learn the grid the rest follows.
Here is the method step by step plus how to pose and dress your figure.
Why Fashion Figures Are Stretched
Real human bodies are about seven and a half heads tall. Fashion figures are drawn eight to ten heads tall with the extra length in the legs.
This is a deliberate design convention. It gives you more room to show garment details like hemlines drape and proportion.
Nine heads is the standard starting point. Editorial illustration sometimes goes to ten or eleven.
The Nine Head Grid
Set this up first. It is your skeleton for every figure.
Draw a vertical line then divide it into nine equal sections. Here is what sits where.
| Section | Body landmark |
| 1 | Head |
| 2 | Shoulders and chest top |
| 3 | Bust and underbust |
| 4 | Waist |
| 5 | Hips and crotch |
| 6 | Mid thigh |
| 7 | Knees |
| 8 | Calves |
| 9 | Ankles and feet |
Feet often extend slightly past the ninth line. That is normal and adds elegance.
How to Draw a Fashion Figure Step by Step
Work light with pencil first. You will erase a lot early on.
- Draw the nine head grid with light horizontal lines.
- Draw the balance line straight down the center from the neck pit.
- Sketch the head as an oval in section one.
- Mark the shoulders about one and a half heads wide.
- Mark the waist narrower than the shoulders.
- Mark the hips roughly the same width as the shoulders.
- Connect the torso with smooth curved lines.
- Add the legs as two long tapering shapes from hip to ankle.
- Add the arms ending around mid thigh.
- Sketch simple hands and feet. Keep them elongated and simple.
- Refine the outline then erase your grid lines.
Do not chase detail early. Get the proportions right first and the drawing will look professional even with simple lines.
The Balance Line Explained
This is the concept beginners miss most.
The balance line is a vertical line dropped from the pit of the neck to the ground. For a figure to look stable the weight bearing foot must sit on or near that line.
If your figure looks like it is falling over the balance line is usually the reason. Check it before you add clothes.
Posing Your Figure
Start simple then build up.
- Straight standing pose. Easiest and best for showing garment details.
- Weight on one leg. Tilt the hips one way and the shoulders the other. This is the classic fashion pose.
- Walking pose. One leg forward with a slight body twist.
- Three quarter turn. Shows side details of a garment.
The tilt trick makes figures look alive. When the hips tip up on one side the shoulders tip down on that same side.
Drawing Clothes on the Figure
Once the croquis is ready trace or draw over it.
- Trace your croquis lightly onto fresh paper or a new layer.
- Draw the garment outline slightly outside the body line so it does not look painted on.
- Add the neckline and closures first since they anchor the design.
- Draw fold lines where fabric bends at the elbow waist and knee.
- Add details like seams pockets buttons and trims.
- Shade lightly to suggest drape and volume.
Different fabrics fall differently. Stiff fabric holds shape with sharp folds. Soft fabric clings and drapes with rounded folds.
Practice Tips That Speed Up Progress
- Reuse one croquis. Trace it many times instead of redrawing.
- Build a croquis library with a few standard poses.
- Draw daily for ten minutes rather than weekly for an hour.
- Copy from photos to learn how fabric actually falls.
- Use tracing paper or layers so you can iterate without redrawing the body.
Professional designers keep template croquis files for exactly this reason. Nobody redraws the body every time.
Common Beginner Mistakes
A few errors show up in almost every first attempt. Knowing them helps you fix your figures fast.
- Legs too short. Fashion figures need long legs. Push them longer than feels natural.
- Head too big. Keep the head to one ninth of the height.
- Stiff pose. Add a hip and shoulder tilt for life.
- Ignoring the balance line. The figure looks like it is falling.
- Too much detail too early. Get proportion right before features.
If your figure looks off compare it to the nine head grid. The problem is almost always proportion.
Drawing the Face and Hair Simply
Fashion illustration keeps faces minimal. The clothes are the star.
- Place the eyes halfway down the head
- Keep features light and simple
- Suggest hair with a few flowing lines rather than every strand
- Leave the face slightly undefined for an editorial look
A simple face keeps attention on the garment. Overworking it pulls focus away from your design.
Adding Movement
Static figures look flat. A sense of movement makes them look professional.
- Tilt the hips one way.
- Tilt the shoulders the opposite way.
- Bend one knee slightly.
- Let the hair and fabric flow in one direction.
- Angle the arms away from the body.
These small shifts turn a stiff mannequin into a figure that looks alive on the page.
Frequently Asked Questions
How tall should a fashion figure be?
The standard is nine heads tall. Realistic human proportion is about seven and a half heads. The extra length goes into the legs so garment details show clearly.
What is a croquis?
A croquis is a quick simplified body template used as the base for fashion sketches. Designers draw or trace over the same croquis repeatedly so they can focus on the clothing rather than the body.
Do I need to be good at drawing?
Not to start. Fashion figures follow a repeatable proportion grid so it is more about learning the system than natural talent. Steady practice improves it quickly.
What should I draw fashion figures with?
A pencil for construction lines and a fine liner for the final outline works well. Marker paper or tracing paper helps since you will trace your croquis often. Digital tools like Procreate and Illustrator use the same principles.
Final Tip Before You Start
Fashion figures are built on a grid not on talent. Nail the nine head proportion and the balance line and everything else gets easier.
Your next step is small. Draw one nine head grid tonight and build a single straight standing croquis. Then trace that same figure five times this week and put a different outfit on each one.